Showing posts with label Web Design. Show all posts

Thursday, July 7, 2011

BuySellAds Clone Script


I need a complete clone of BuySellAds.com

If any of the words above sound beyond xhtml/css for you. Do not reply.

A complete buysellads.com clone. ajax features with web2.0 tracking graphics and charts for analytics. Custom javascript with encrypted code. PayPal and Nochex API experienced needed, amazon aws service api experience may be needed as buysellads uses amazon api.

Wednesday, April 20, 2011

Hover Effect Thumbnails Only Related Posts


Back in December i published a post showing you a great Related Posts with thumbnails gadget.Blogger Related Posts GadgetThat gadget displayed a selected number of related posts generated using labels, the posts are displayed using a thumbnail with the title of the post below.That post has been one of the most popular on Spice Up Your Blog over the last few months and today i have another Related Posts With Thumbnails Gadget but with a very cool feature.

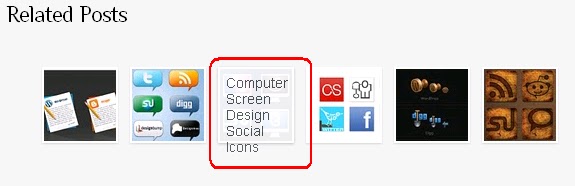
I found this gadget in a template published on Templates Blog BestBloggerTemplates.Net and knew it would be popular.This Related Posts gadget does not display the title of the post below the Thumbnail but rather has a Hover Effect to display the post title.So below your posts will be just the thumbnails but when you hover your cursor over them the thumbnail is replaced by the title.

Hmmm not easy to explain in text so take a look at the screenshots and live demo below.


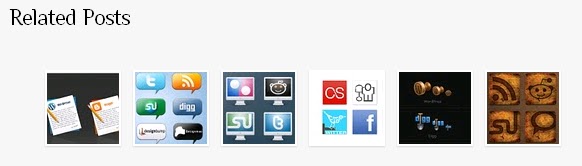
Screenshot - Normal :


Screenshot Hover - You can see the title displayed when the cursor is hovered :


Live Demo - I'm using this gadget on  Social Icon Site (Scroll To End Of Any Post)

Add Related Posts Gadget To Your Blog

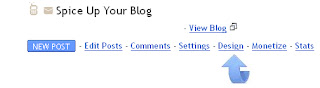
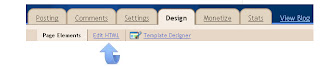
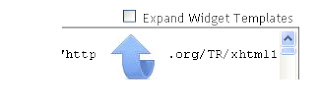
Step 1. In your Blogger dashboard click Design > Edit Html > Tick the Expand Widget templates box.


Step 2. Find the following piece of code in your blogs Html : (Click Ctrl and F for a search bar to help find the code -)

]]></b:skin>
Step 3. Copy and paste the following code Directly Above / Before ]]></b:skin>

<!--start related posts css Info : http://www.99blogger.com-->

ul#related-posts{
font-family:"Droid Sans",Helvetica,Arial,sans-serif;
font-size:10px;
list-style: none;
margin: 20px 0;
padding: 0;
text-transform: none;
}
ul#related-posts li{
float: left;
height: auto;
margin:0 5px;
padding: 2px 1px 2px;
list-style-type:none;
}
*html ul.rp#related-posts li{
margin:0 13px;
}
ul#related-posts li a {
-moz-box-shadow: 0 1px 2px rgba(0, 0, 0, 0.15);
border: 2px solid #FFFFFF;
display: block;
height: 72px;
position: relative;
width: 72px;
}
ul#related-posts li a {
color: #474C51;
text-decoration: none;
text-shadow: 0 1px 0 #FFFFFF;
}
ul#related-posts li .overlay {
height: 66px;
line-height: 16px;
padding:6px 0 0 6px;
position: absolute;
width: 66px;
z-index: 10;
}
ul#related-posts li .overlay {
}
ul#related-posts li a:hover .overlay {
background: #fff;
display: block !important;
opacity:0.9;
}
ul#related-posts li img {
bottom: 0;
padding:0px !important;
}
ul#related-posts li a:hover {
-moz-box-shadow: 0 1px 3px rgba(0, 0, 0, 0.25);
}

<!--end related posts css.Info : http://www.99blogger.com-->
Step 4. Find the following piece of code in your blogs Html : (Click Ctrl and F for a search bar to help find the code -)

<div class='post-footer'>
Step 5. Copy and paste the following code Directly Below / Under <div class='post-footer'>

<!--start related posts code Info : http://www.99blogger.com-->
<b:if cond='data:blog.pageType == &quot;item&quot;'>
<h3>Related Posts</h3>
<script type='text/javascript'>
var defaultnoimage=&quot;https://blogger.googleusercontent.com/img/b/R29vZ2xl/AVvXsEiXYH4VSSPiRfBD4HMJh_9Y9J1yQfhHJD1yX1bhqbMzW4L3HLRsFqbCFfwdwJe8W7M_v6vqp2ZtlnYB1rNQamIxVZ_E62aK6rH37nVDabb-RZFLdITLqnR0Q0R_gLywYzblOZEYeYn2lhk/s1600/no-image.gif&quot;;
var maxresults=6;
</script>
<script src='http://spiceupyourblogextras.googlecode.com/files/hover-related-posts.js' type='text/javascript'/>
<b:loop values='data:post.labels' var='label'>
<b:if cond='data:label.isLast != &quot;true&quot;'>
</b:if>
<script expr:src='&quot;/feeds/posts/default/-/&quot; + data:label.name + &quot;?alt=json-in-script&amp;callback=related_results_labels_thumbs&amp;max-results=6&quot;' type='text/javascript'/>
</b:loop>

<script type='text/javascript'>
removeRelatedDuplicates_thumbs();
printRelatedLabels_thumbs(&quot;<data:post.url/>&quot;);
</script>
</b:if>
<div style='clear:both'/>
<br/><br/>
<a href='http://www.99blogger.com'><img alt='Best Blogger Tips' src='http://3.bp.bloodspot.com/_rKG-ziTSNUQ/TQ5eV0U0EiI/AAAAAAAACik/xo2eFaDbfrE/s1600/best+blogger+tips.png'/></a>
<!--end related posts code Info : http://www.99blogger.com--->
Optional Changes

-You can change the title above the gadget from Related Posts (In Blue Above).

-You can change the number of posts displayed from 6 (In Red Above)

-The Gadget is set to only display on the post pages, if you want it displayd on the home page also remove the code highlighted in Green above.

Step 6. Save your template.

Check out more of our Blog Gadgets and Featured Posts.

That's your Hover Effect Related Posts With Thumbnails, i would like to give credit to BloggerPlugins for the original script and BloggerzBible created the template in which i found the gadget along with making some changes to the original.

Drop Your Comments, Views And Questions Below.

Tuesday, April 19, 2011

Top 3 Contact Form WordPress Plugins


If you’re using mailto:your-mail-box links, it is not a wise move because your email will be scanned by spammer viruses. Contact form is one of the most effective anti-harvesting method from spammers. The contact form provides a textarea for the message, and an input for the sender’s e-mail address. The server-side script that processes the posted form data, is then responsible for sending the actual message, which means that the e-mail address of the recipient is never exposed.
If you’re using wordpress, you’re in luck. There’re many different wordpress plugins you can use to create a contact form to reduce spam. I’m including some of the most common ones below:

WP-ContactForm Akismet Edition

The basic purpose of WP-ContactForm Askimet Edition is to make it easy to have a “Contact Me” form on your WordPress blog. Additionally, if you have Akismet installed, all messages will be checked for “spaminess” before being sent to you, effectively keeping the spammers out of your face. The reason why I listed it here because I like the idea of this plugin as combining with Askimet. With this plugin you don’t need any annoying image verification codes or checks to see if the user is “human” or not. If anyone attempts to spam you, it will likely never reach your e-mail box. Only one note for you, this plugin is not currently compatible with WordPress 2.5. He said that he was going to update it but there’s no update since April 22, 2007

WordPress-Ready Contact Form

WordPress-Ready Contact Form is an easy-to-install contact form with many accessibility, usability, and security features. If you use some of the more popular WordPress Themes such as Green Marinee, Connections, Ocadia, … contact form themes have been provided to get you up-and-running faster than ever. I’ve just noticed that Brian Gardner, owner of Revolution Themes is using this one.

CForms II

cform II wordpress plugin, contact form
Cforms II is a highly customizable, flexible and powerful form builder wordpress plugin, covering a variety of use cases and features from attachments to multi form management, you can even have multiple forms on the same page! I personally use CForms II on my blog (you can see it live on my contact page) because I love its features. The only thing I do not like this plugin is its size (900KB+) then I do not update it regularly! Anyways I highly recommend this plugin for building your contact form.
Main features of cForm II plugin
  • Customizable fields with optional checkboxes, radio buttons, …
  • Several fancy “styles”, change the look of your form with a single click
  • Create multiple contact forms and display them on however many pages you want.
  • Tell-a-friend form support.
  • Backup and restore custom forms to other sites.
  • Visitor verification questions, along with CAPTCHA support
That’s about it. Hopefully you find my post interesting and if you have any other great plugins for me then I’d like to see them. Do not forget to subscribe to our feed to stay up to date with all of our free themes and tutorials!

Contact Forms for Blogger


Naturally, blogs include a method of getting in contact with the owner or editor/writer of the site – through comments. However, this isn’t the best method for contacting the owner, especially if you need to give personal details or something that can’t be shared with the entire community.
Some blogs don’t even contain a contact form – they rely solely on comments, but this isn’t an ideal situation should a user encounter a problem with your site (copyright, display issues, and so on). Therefore, it is essential to place some type of contact form on your blog.
Previously, we’ve covered Top 3 Contact Form Plugins for WordPress, but through use of Blogger and other systems, there have been few solutions to adding a contact form seamlessly without having to code the form into a new blog post. The best solution for resolving this problem is using a solution that creates contact forms using HTML or using an off-site solution that gives you some of the same functionality.

Kontactr

contact form blogger
Kontactr provides a simple, easy way to create contact forms. All you have to do is use their three-step process to create your very own contact form for your website. They even claim that it’ll take “no more than 10 seconds to sign up.” The service requires that you sign up for an account but this is likely due to the need to add your email address.
When you create the account, you will be able to embed links in your website or blog, which presents a more attractive way for your readers to contact you than through a direct mailto link.

Free Contact Form

This form allows you to implement a fully accessible, spam-free form on your website. It is more than just a contact form, as you can use it for other purposes.
While there is a professional version, you can still use the free version, although it lacks some of the main features of the professional version.

Mailjol.net Contact Form

This site provides a solution that allows you to create various forms. However, I noticed that the styling isn’t the most ideal of all solutions, but is desirable if you want a more contact-like rather than survey-like version.
A number of the key features include: No Ads, Unlimited Questions, Easy Form Creator, Spam Protection, and more.

Wufoo

Wufoo contact form
The Wufoo site presents a clear message: to make forms easy, fast, and fun. You can create contact forms, online surveys, and more with their tool, which doesn’t involve editing or viewing a single line of code. They have several payment options, starting with a free solution (one user, three forms, three reports, and ten fields, up to a hundred entries per month) through an account that allows unlimited forms and reports.
All in all, this service stood out the most for me, not for what is included in the free package, but what you can do with what is at your disposal. Just take a look at their Examples Page.
  • Graceful Degradation
  • W3C Valid XHTML and CSS
  • 508 Accessibility Compliant
  • Can be Personalized and Branded with Themes
  • Customized Confirmation Messages
  • Redirect to Web Page on Confirmation
  • Confirmation Email Receipt to user
  • … plus hundreds of additional features

Free Contact Forms

A simple, effective solution for creating a brief contact form for your website.

WRASAP

Despite the rather ridiculous acronym for a simple tool, this “Will Reply As Soon As Possible” contact form does one thing – allows you to place a contact form on your website or blog. It sends you an email message with each new comment, and integrates a CAPTCHA-driven spam filter. Essentially, it’s just a customizable webpage with a contact form.

Response-O-Matic

Response-O-Matic contact form
Ideal for people who want an effective solution, this site offers the ability to create a contact form without the need to learn HTML. Simply tell the wizard what you want to see in your form, then copy and paste the code into your website – it’s truly that easy.
The free account is limited but should suit most users.

Odio Works – Custom Feedback Form

A simple and easy-to-use contact form for placing on nearly any site.
If you want to customize your form or implement a more advanced solution, check out Web Resources Depot’s post with 16 Free AJAX Contact Forms.

Conclusion

If you choose to search elsewhere for contact form plugins or scripts, please be aware that some have more advanced spam protection, better options, and ways to customize the form template to your liking. Not every solution is easy to use nor compatible with every blog platform.
If you have any other work-arounds for placing contact forms in non-WordPress blogs, please let me know through the comments

Sunday, April 17, 2011

Shoutmeloud Thesis Theme For Blogger free


Shoutmeloud-Thesis-Theme
Hi friends!!! It's been a long time since I posted an article on this blog because I was working on the highly SEO optimized thesis theme exactly similar to that of Shoutmeloud blog. Many people wanted the widgetized version of the thesis footer. Apart from the footer, many people demanded the complete theme too. To all those who eagerly waited for the launch - here we are, with the basic version of the Shoutmeloud thesis theme!!!

The template which I have designed is exactly similar to the shoutmeloud theme except for few areas. The comments section and the ads below each post are the areas where the coding has to be worked out. I will launch an updated version for this theme in a few weeks time. In fact, the step by step customization for each portion of this theme will follow up in the upcoming weeks - includes the coding for the sidebar widgets (subscription box, banner ads, etc..) as well.

You may have a look at the following two pictures for a complete screen-shot of the home page and the post page. Hit the demo link above to check out a live demo of the thesis theme now.
Thesis-Theme-For-Blogger-Homepage-Preview
Thesis-Theme-For-Blogger-Postpage-Preview

Since the features for this template are many in number, I plan to publish articles about each feature along with its customization in the upcoming weeks. So, don't forget to subscribe to my blog - Subscribe Via RSS. Else, you will lose track of the template customization. However, I will list out all the features of this template here.


FEATURES OF THIS TEMPLATE:
1. TOP NAVIGATION BAR - Added | For Customization - Article Coming Soon...
2. HEADER WITH 468x60 BANNER AD - Added
3. SUB NAVIGATION BAR - Added | For Customization - Article Coming Soon...
4. GOOGLE ADSENSE LINK UNIT (728x15) - Added | Replace with your ID
5. ADSENSE UNIT BELOW POST TITLE (300x250) - Added | Replace with your ID
6. READ MORE AND OPINION BUTTONS - Added
7. RELATED POSTS - Added
8. MULTIPLE AUTHOR WIDGETS - Added
9. RETWEET AND FACEBOOK SHARE BUTTONS - Added
10. SOCIAL BOOKMARKING BUTTONS BELOW POST TITLE - Added
11. SEARCH BAR - Added
12. SIDEBAR SUBSCRIPTION WIDGET - Coding will be posted soon...
13. NEWER/OLDER POSTS/HOME BUTTONS - Added
14. FOOTER (For Blog Categories and Logo) - Coding will be posted soon...
15. BACK TO TOP BUTTON - Added

All those which carry the text coding will be posted soon or article coming soon mean the articles are yet to be published. Once I publish the article for customization, I will be updating the list here. You can also send me suggestions via comments about various other features which you wish to have on this theme - for example, a featured content or an ad unit at the end of the post that will facilitate 125x125 ad banners, etc..

Moreover, if you feel some portion of the template is little bit different from that of the original shoutmeloud thesis theme, you may leave your opinions via comments. I will answer to all your queries. So, share your thoughts via comments!!! We would love to hear from you!!!

Note: Template best viewed on Firefox. IE does not support curved CSS. So, I suggest you to view it on Firefox.

Saturday, April 16, 2011

Who Says Blogger.com Doesn’t Have Good Blog Theme ?


Blogger Many people prefer wordpress for blogging platform just because they have a rich set of blog themes and community where one can find lots of free wordpress themes/templates ranging from comic to gadgets and sports to newspapers themes. People always complain that Blogger.com doesn’t have good theme for blog. Well, to help blogger.com users, Rick Klau, product manager for blogger team at Google, asked readers to suggest good third party templates for blogger.com. And there are the rich blogger.com templates for you.
blogger themes
  • BTemplates. A free directory of user-submitted templates, classified by type and/or features.
  • The Cutest Blog on the Block. Run by Becky and Ashley of 2 Moms Talk, this site offers free, premade layouts, as well as customizable backgrounds.
  • Blogger Styles. Gallery of submitted templates, ranked by visitors and includes detailed configuration instructions.
  • FalconHive. Conversions of WordPress templates upon request, along with archive of past conversions.
  • All Blogspot Templates. Templates in 1-, 2- and 3-column options. Also includes AdSense-ready templates.
  • Zona Cerebral. Spanish site with dozens of templates to choose from, including several converted WordPress themes.
  • Quite Random. A number of free templates, and several Blogger-specific tutorials regarding setup and layout editing.
  • ChicaBlogger. In Spanish, templates designed primarily for women.
  • Deluxe Templates. Hundreds of templates, including many converted WordPress themes. Also has a nice "tips & tricks" section for customizing Blogger.
  • Pyzam. Thousands of templates, browsable by category and sortable by recency or popularity.
  • Our Blog Templates. 160+ free templates, all well-labeled for easy browsing to find the one you want.
  • eBlogTemplates. Combination of free and premium templates, and a wealth of tips for tweaking your Blogger blog.
Note: for the most part, sites above provide templates for Blogger's "Layouts". If you still see a "Templates" tab for your blog, you need to upgrade your blog to take advantage of these new features. This help article has some more information about using Layouts.
Finally, cheth shared a recent post he wrote where he finds his favorite templates (many taken from the sites above). It's a good overview, and gives you a good visual indication of just how varied Blogger templates can get.
Make sure you should download the current template and put it in a safe place, before making any changes to your current template (Click "Layout", then "Edit HTML" and then "Download full template".). Blogger cannot provide support for independently created templates. If you choose to use a template built by someone else, make sure to figure out how easy it is to reach them if problems arise.

Free Essential Tools for a Blogspot Blogger


Today's post is a collection of free internet tools essential for any Blogger Blogspot webmaster but particularly beginners who wish to improve and grow their blog.

While there are lots of tools on the internet that are of use to a Blogger Blogspot blogger you have to hunt for them. Chances are that you may have already discovered some of these while others may be quite new to you. Here is my list of some free internet tools that I find invaluable in building my blog. This is not a definitive list by any means. I will update it regularly as I discover more and more tools.


Free Banner Generator
Banner Sketch is an easy to use tool to help you create a title banner and other banners for your blog


Free Icons for RSS Feeds
Find stylish rss feed icons for your blog at Hongkiat Ultimate List of Feed Icons

Free RSS Icons to Spice up Your Blogger Blogspot Blog

Free Image Watermarking Service
Add a watermark to your images to deter image theft on your blog with this free image watermarking service from Pictureshark.com


Free Fav Icon Generator
There are a bunch of places on the web that you can go to create your own fav icon. Try these:
favicon.cc
Dynamic Drive
Online Icon Maker


Free Clipart
There are lots of places to find clip art on the net but WPClipArt is my personal favorite offerring thousands of high quality public domain images all completely free

Get your public domain clip art from WPClipArt.com.  It's AOK!Free Code Converter
Code Converter
Use this tool to parse Google Adsense code and other third party code before entering it into a Blogger template


Free Keyword Tools
Wordtracker will help you identify keywords in your subject area

You could also try Google Adwords


Meta Tag Analyzer
These Meta Tag Analyzers will provide you with detailed information about your blog description, keywords and meta tags
Submit Express
SEO Centro


Free Keyword Density Tool
Check the density of your keywords in your posts with this free keyword density tool from SEOChat


Free File Size Checker
Web Sniffer will check the size of your burned Feedburner feed to avoid exceeding the 512K maximum file size


Free Google Page Ranking Lookup Tool
Find out what your Blogger blog's Google Page Ranking is with this free lookup tool from SEOChat


Free Browser Testing Tool
Look up how your Blogger Blogspot blog will appear to a variety of internet browsers and detect any problems with your template with this free browser testing tool from Browsershots


Free HTML Tutorial Help
Need help with HTML I have found w3schools.com provides excellent tutorials and information on HTML


Free File Storage
FileAve.com offer up to 50MB of free file storage and hosting which is ideal for storing files and scripts. Particularly useful for storing any files that readers can download from your blog.

Also try Boxnet.com which offer 1GB of storage and 4shared.com which gives you a whopping 5GB.


Free Web-Based File Extractor
Sometimes you may wish to extract a file online. My Webzip provide a free archive creation and file extraction service that works on the fly supporting zip, rar, tar and tgz file archives. Also try Wobzip which offers a similar online service


A collection of free internet tools aimed at the beginner Blogspot Blogger. If you have any suggestions for other tools you have found useful please let me know.

10 Tips to Build Blogger Blogspot Site Traffic


This article discusses 10 easy ways Blogger (Blogspot) Bloggers can build site traffic and in many cases improve SEO - search engine optimization. By implementing these steps you will improve the likelihood of your site ranking more highly in search engine results of major search engine players Google, Yahoo and MSN and as a result increase the number of visitors accessing your site.

10 Easy SEO Tips for Blogspot Bloggers to Improve Search Engine Rankings

1. Make Your Title Tags Search Engine Friendly
One of the most important tweaks necessary for Blogspot Blogs is the adjustment of the title tags of your website because Blogger.com by default has not optimized these for search engines. To prove this point navigate to an individual post on your blog and you will see that the blogname appears first in the title bar at the top of your browser followed by the post name. As search engines place greater value on the first words of an entry this puts your site at a disadvantage in search engine results. Fortunately it is easy to reverse the blog name and the post name with a simple tweak. For instructions on how to change the order of these title tags please refer to my article entitled Adjust Blogger Title Tags to Improve SEO

Reversed order of Blogname and Post Name Improves Search Engine Results

2. Create Search Engine Friendly Permalinks
Blogger automatically generates a permalink based on the title of your post each time you make a post. For this reason it is important to craft your title carefully. Permalinks are sometimes less than ideal especially if you have a long title. Take for example the following permalink for one of my posts:

http://blogknowhow.blogspot.com/2009/02/improved-permalinks-for-blogger-posts.html

You will see that it is search engine friendly in that in contains 2 keywords blogger and permalinks. However you may be surprised to know that How to Create Search Engine Friendly Permalinks for Blogger Posts is actually the title of this post not Improved Permalinks for Blogger Posts. I have initially used a title that is keyword rich and then after publishing gone back and entered a more descriptive title. No matter how many times I change the title the original permalink remains. If I had entered the second title straight away I may have ended up with the following permalink:

http://blogknowhow.blogspot.com/2009/02/how-to-create-search-engine-friendly.html

Not very pretty is it? And as you can see the whole point of the post is lost.

For more information on crafting permalinks please refer to my article How to Create Search Engine Friendly Permalinks for Blogger Posts


3. Add a Social Networking Button to Your Blog
By adding a Social Bookmarking button to your website you will enable visitors to your blog to create links to popular social bookmarking sites such as Google, Technorati, Facebook, MySpace, Digg, Stumble Upon, Reddit, Delicious, Furl, Yahoo etc. This means that visitors to your site will be able share these links with others thereby helping you attract more traffic to your site and encourage return visits.

Another benefit of a social bookmarking button is that you will be able to identify visitor trends and social bookmarking behaviour on your site. For more information on how to add a free Add This Social Bookmarking button to your Blogger blog please refer to my article Add a Social Bookmarking Button to Your Blog.

Add a Free Add This Social Bookmarking Button to Your Blogspot Blog

4. Submit a Sitemap of Your Blog to Popular Search Engines
If attracting traffic to your site is important to you then it is imperative that you ensure that your Blogger (Blogspot) blog is properly indexed by popular search engines such as Google, Yahoo and MSN. One way to expedite this is to submit a sitemap to each of three major search engines. Please refer to my tutorials on website submission, authenticating your site and adding your site feed to Yahoo Site Explorer, Google Webmaster Tools and MSN Tools.

Google - Submit Your Blogspot Blog Sitemap to Google

Yahoo - Submit Your Blogspot Blog to Yahoo

MSN - Submit Blogger Sitemap to MSN Live Search

Also take a look at my tutorial on submitting your blog to major search engines

5. Build Quality Links
If you want to rank highly in Google and other search engines then you need to generate quality in-bound links. That doesn't mean exchanging links with everything and everyone as I see some new webmasters do. A few quality links from authoritative sites will boost your page rankings quickly and are far superior to a bunch of links from low ranking sites.

There are several good ways to generate links to your blog. One easy way is to to submit your site to blog directories. For more information on recommended blog directories please see my article Submit Your Blogger Blog to Blog Directories. Another way to cultivate in-bound links is to submit your best articles to article directories. A third possibility is to actively participate in forums and on other related blogs where commenting affords you the option of adding a link to your site.

I would recommend linking to DMOZ (Open Directory Project). Care needs to be taken to submit your site to the correct subject area. Becoming listed can take awhile so patience is needed.


6. Write Quality Content and Post Frequently
If you have read any articles on the subject of Blogging and SEO you will no doubt have observed writers emphasising the importance of quality content. I can't stress enough how much return visits depend on providing inducements to visitors to come back. If your site content is well written and informative half the battle is won. Make sure you post frequently so that visitors can see the value of subscribing in a reader. Take some care with the presentation of your content and images as this will present a professional image. Avoid common pitfalls like bad grammar and spelling mistakes which stand out like a sore toe and detract from a visitor's overall positive experience of your site.

One leading professional blogger Yaro Starak recommends the use of pillar articles. These are articles that don't change over time and continue to attract visitors. The best pillar articles explain some concept, provide definitions, give advice or present some argument. Your site needs to have at least 5 pillar articles and more if you can manage it. Pillar articles need to be more than 500 words long, crafted to generate interest and provide a welcome resource to your visitors.

7. Ensure Your Content is Keyword Rich
Apart from the quality of your content there is the question of keyword density. The more keyword rich your posts are the greater the likelihood they will appear higher in search engine results. This means it is worth the effort of crafting your content in such a way that you make use of important keywords and keyword phrases frequently used. Don't go overboard however as Google is smart enough to recognise if your pages are littered with keywords and nothing much else. A useful free SEO tool to help you optimise your site using keywords and labels is Google Adwords. Another good tool to help you quickly craft keyword rich material is Live Keyword Analysis which assesses the keyword density of keywords and keyword phrases of any post you paste into the analysis box.

When writing posts make sure your opening sentence describes what the article is about and contains your keywords and keyword phrases. It is important that your first sentence is keyword rich as search engines like Google give more emphasis to content at the beginning of the post. Also it is worth including a short ending statement about the content of the post as there is some evidence that Google also places value on the content at the end of the post.

8. Manage Your Feeds Carefully
Feeds help your visitors find your site so they need to be managed carefully in order to make the most of them. Your site feeds are an important way to create backlinks too. Backlinks from authoritative sites are highly valuable and can boost your page ranking. For information about showing backlinks please refer to the Blogger Help Article About Backlinks

Ensure you have your RSS feed icons clearly visible for visitors to see. The most superior positioning of the feed icons on your site is in the header. Watch out for coming tutorials on how to improve positioning of RSS feed links.

You can redirect your feed to a feedburning service like Feedburner and then add a chicklet to your site (orange RSS feed button) so that the feed is instantly available on click. Please refer to my tutorials about Blogger feeds:Burn a Blogger RSS Feed at Feedburner and Blogger RSS Feeds and Feedburner. To add a FeedFlare to your burned feed check out my tutorial.

If you haven't burnt your feed you can try adding a Subscription Links widget to a sidebar too to encourage visitors to subscribe to your site in popular on-line readers such as Google Reader. You will find the Subscription Links widget available under the list of gadgets.

Blogger Subscription Links Widget installed on Blog Know How
Display your most recent posts by configuring a feed widget. Under Layout > Page Elements add a feed gadget to a sidebar. Enter the URL of the default feed of your site which will be:

http://yoursitename.blogspot.com/feeds/posts/default

Enter Recent Posts in the title and then Save. For more information about adding a posts feed widget to a sidebar please refer to my article Add a Recent Posts Feed to a Blogger Blog

You can do the same for comments if you wish to have a list of recent comments displayed in your sidebar. In this case you would enter:

http://yoursitename.blogspot.com/feeds/comments/default


For more in depth coverage about adding a comments feed to your sidebar please see my article Add a Recent Comments Feed to a Blogger Sidebar

Ensure you set up your site feeds to show the full text. To check this navigate to Settings > Site Feeds and select yes from the dropdown box for all three feeds.

Consider having a feed specifically for a popular label if it contains 20 or more posts.


9. Optimize Your Use of Images
Chances are you don't give a thought to images when you insert them into your posts but images can be optimized by careful use of filenames and the alt attribute. When naming images avoid long names. Instead give your images distinctive filenames rather than something generic like 00045.jpg which has no meaning.

The alt attribute allows you to specify what text is displayed when a visitor's mouse hovers over an image. The alt attribute also gets displayed if the image is not available for some reason. By optimizing your alt attributes you are increasing the likelihood of your images appearing in Google Image Searches.

Optimizing your alt attributes is easy. Every time you insert an image into a post look for the alt attribute which will be empty by default

style="DISPLAY: block; MARGIN: 0px auto 10px; WIDTH: 320px; CURSOR: hand; HEIGHT: 122px; TEXT-ALIGN: center" alt="" src="http://3.bp.blogspot.com/abcdeefgBxA/4560/sidebar-add-this-bookmark-button.JPG" border="0" />

Fill in the alt attribute with a useful description of your image

style="DISPLAY: block; MARGIN: 0px auto 10px; WIDTH: 320px; CURSOR: hand; HEIGHT: 122px; TEXT-ALIGN: center" alt="Blog Know How Sidebar Showing Add This Bookmark Button" src="http://3.bp.blogspot.com/abcdeefgBxA/4560/sidebar-add-this-bookmark-button.JPG" border="0" />

Depending on the subject of your site you can gain a lot of traffic from the images you post on your site. The more unique the content of your site the greater the likelihood that your traffic will stem from images. Without going overboard ensure you have a good mix of images to support your articles.


10. Take Advantage of Web Analytics Services
Having implemented some strategies to improve crawling and indexing of your site by search engine giants Google, Yahoo and MSN chances are you will want to see how these changes have impacted on the traffic reaching your site. Web Analytics programs are a valuable tool for gaining insight into visitor behaviour and trends. The kind of information that a program like Google Analytics will provide is:
how users reach and behave on your site

the most popular content on your site

the impact of optimizations you make to your site (e.g. by how much did changing the order of title tags improve traffic from search engines?)


To integrate Google Analytics into your Blogger (Blogspot) blog please refer to my articles Track Visitors to Your Blogger Blog and Add Google Analytics to Blogger Blog

This article has discussed 10 easy ways to build site traffic and improve SEO for Blogger (Blogspot) Bloggers by addressing the following areas: feeds, images, social bookmarking, title tags, permalinks, content, analytics, submitting your blog to search engines.

How to Add a Subtitle to Blogger Posts


This Blogger tutorial shows you how to easily and quickly add a subtitle to your Blogger posts (Blogspot posts) so that both search engines and readers will have more information about your post. I also discuss the benefits of adding subtitles to Blogger articles. This is an easy tweak to your Blogger blog that anyone can carry out in a couple of minutes.

blogger Blog with Subtitle Under Post for Emphasis and Search Engine Friendliness

Benefits of Using Subtitles in Posts
Adding a subtitle which appears below the title of your post can be both eye catching and informative. For instance a titling schema for this post could be:

Title: Add a Subtitle to a Blogger Blog

Subtitle: Make Your Posts More Search Engine Friendly and User Friendly

If you craft your titles and subtitles carefully you will encourage more targeted readers of your blog as they will be able to see at a glance what your post is about rather than reading the whole article. Your traffic therefore might be slightly less but they will be far more targeted to the content of your site resulting in a lower bounce rate.

If the subtitle you choose for your Blogger post is keyword rich then you are also improving your chances of gaining a higher position in search engine result pages because search engines give added weight to headings and to text early on in an article. By adding a subtitle to a Blogger post you have a SEO tool which if used effectively could result in more visitors finding your site because of higher keyword density.

You can of course add a subtitle manually to each post and format it everytime. The advantage of this method over doing it manually though is that all the formatting is in the stylesheet section of your template so you only have to change the colour scheme and font variables in one location and Blogger will look after the rest. Any change will be reflected in each and every post that has the subtitle &ltdiv> tags.


How to Add a Subtitle to Blogger Posts
This tutorial guides you through the steps to take to add a subtitle to your Blogger blog. The trick requires only takes a few short minutes and requires only a small snippet of code to be added to your template. Provided the instructions are followed anyone can do this including beginners and new bloggers. Interestingly it is not widely known or written about in technical blogs that a subtitle can be added to your Blogger Blogspot blog posts yet the advantages are considerable.

1. Log in to Blogger and navigate to Design > Edit HTML

2. Find the </b:skin> tag in your template. If you are have difficulty finding it use CTRL + F to bring up the Blogger toolbar at the bottom of your blog and enter the tag </b:skin> into the search box on the toolbar

3. Copy and paste the code below into your template making sure that it appears before the </b:skin> closing tag.

.subtitle{
font-family:Trebuchet MS',Verdana,Arial,Sans-serif;
font-size:15px;
color: #ca1717;
line-height:20px;
}

Add a Subtitle to a Blogger post - edit template and customise if desired

Update November 14, 2010. This code inserts a subtitle in red. You will need to change this color to match your template. See later in this post for information on how to add styling or change the color of the subtitle. If you wish to use a known variable as shown in the above image you can. color: $dateheadercolor; could be used for example provided this variable had already been declared in the variables section of the template.

4. Save Template

5. Go to the post you wish to add a subtitle to by clicking on the Posting tab and then the Edit Posts link.

6. Copy and paste the following code into your post ahead of any other text.

<div class="subtitle">Subtitle Text. Please Substitute for your own text</div>

Add a Subtitle to a Blogger Post

7. Substitute your own text between the <div> tags

8. Navigate to Settings > Formatting and under the last option Post Template enter the following into the box:

<div class="subtitle"></div>

This will mean that every time you create a post you will have the tags appear automatically. All you need do is place the text of your subtitle between the tags. If you don't want to use a subtitle for a particular post just delete the tags.

9. Save Changes to Post and click on View Blog to admire your new subtitle.

blogger Blog with Subtitle Under Post for Emphasis and Search Engine Friendliness

Customizing the CSS Styling of a Blogger Subtitle
It is easy to customize your subtitle for a different font type, color and size. Just change the code you added before the </b:skin> tag. If you want a specific color for instance you could change the color I have chosen for another color, increase the font size, and change the font face to Times Roman for instance. Thus your code would become something like this:


.subtitle{

font-family:Georgia, "Times New Roman", Times, serif;
font-size:16px;
color:#ff6600;
line-height:20px;


This Blogger tutorial has shown you how to add a subtitle to your Blogger posts (Blogspot posts) quickly and easily. I have discussed the benefits of inserting a subtitle feature on a Blogger blog including how this might assist search engines to correctly index your blog articles. I have also shown you how to customize your subtitle to your own individual requirements using CSS styling

Add a Feedburner FeedFlare to Blogger Feed


If you have burned your Blogger Blogspot blog feed at Feedburner you can easily add a FeedFlare to the footer of the feed. FeedFlare helps you to distribute, inform and create a community around your content. Adding a FeedFlare to the feed of your blog allows readers to select from a range of social bookmarking links which appear at the end of each post. FeedFlare offers subscribers some easy ways to email, tag, share, and bookmark your blog content by linking them with a range of services such as Stumble Upon, Digg This, Facebook, Technorati, del.icio.us and Mixx.

It is not difficult to add a FeedFlare to your Blogger feed but it does require you to add a snippet of code to the template of your blog. Don't be put off as I will guide you through this process by providing a step by step walkthrough. This tutorial caters for all levels of technical knowledge from the newbie Blogger to the experienced Blogger.

To see a FeedFlare in action right now check out the end of each post in the Blog Know How feed


How to Add a Feed Flare to Your Blogger Feed
If you have yet to burn your Blogger feed at Feedburner please refer to my articles Blogger RSS Feeds and Feedburner and Burn Blogger RSS Feeds at Feedburner for instructions on how to burn your feed and benefits of burning your blog's feed at Feedburner.

1. Login to Feedburner with your Google Account. From the My Feeds page click on the link to your blog

2. By default you will be taken to the Analyze page so you need to select the Optimize tab from the menu

3. Select FeedFlare from the Side Menu

4. To create a simple FeedFlare check the boxes of the options you would like. At a mininum I suggest you select email and comments count (for blogger) in addition to Stumble Upon, Digg This, del.icio.us and Facebook.

5. Once you have selected the desired options you can reorder them in the Preview/Reordering box below using drag and drop to shuffle the links around. I think it is a good idea to have comments either at the beginning or the end of the list as readers are more likely to notice it in this position

6. Click on Activate. Do not close this window as we will be returning here.

7. In a new window login to Blogger if you are not already logged in and navigate to Layout > Edit HTML

8. I strongly suggest you back up your template as a precaution by downloading it to your computer

9. Use CTRL + F to bring up the toolbar and enter the following code into the search box
&ltdiv id='post-footer'>
Find Post Footer Code
10. Return to the FeedFlare page at Feedburner and select Blogger from the drop down menu at the bottom of the page to get the HTML Feedburner code. A dialog box will appear with some instructions. Copy the code found in item #1. Editing Blogger Layouts. To copy right click your mouse and choose select all to highlight the code and then right click again and choose copy

11. Paste the Feedburner code into your template directly below the line of code in your template you just located &ltdiv id='post-footer'>
Add Feedburner FeedFlare Code into Your Blogger Template
12. Click on the Save Button

13. Return to Feedburner. Immediately below your blog's title and just above the Analyze tab you will see two icons. Click on the RSS icon (left button) which will bring up your blog feed.

Feedburner feed icon
14. Scroll to the bottom of the first post and you will see your new FeedFlare in action.

FeedFlare in Blogger Feed Redirected by Feedburner

Other FeedFlare Options
For smarter looking links you may choose to customize the FeedFlare's appearance by tweaking the CSS.

To prevent stealing of your original content otherwise known as blog scraping or splogging you can add personal FeedFlares such as a permalink to a copyright notice and a permalink to you the author of the blog.


In this tutorial you have learned how to create a FeedFlare at Feedburner which appears at the bottom of each post in your Blogger blog's feed. By adding the FeedFlare to the footer of your Blogger blog you help build an online community around your content by offering your readers some choices about how they share, link to and act on the information contained in your blog

Avoid 6 Common Blogger Mistakes


If you want your Blogger blog to sizzle and really take off there are some pretty important blogging pitfalls that you need to avoid. In today's article I will be talking about 6 of the most common mistakes new bloggers make on their Blogger Blogspot blog and how to avoid them.

1. Avoid Poor Content
I can't emphasize enough that the standard of your content will make or break your blog. Poor content = few return visitors. Good content on the other hand will attract visitors and keep them coming back to check out what's new.

Successful bloggers write clearly, know their subject and develop their own unique voice. A conversational style is often recommended but I suggest just write naturally and that naturalness will shine through.

Post quality well researched content that is interesting and topical. To do this you need to know your audience. Who are your readers? Do you know? If you don't know your target audience it will be hard to put yourself in their shoes which is exactly what you need to be able to do when you sit down to write a post. Ask yourself what are my readers looking for that would make them visit my site and read my post. Are they looking to be entertained, informed or a bit of both? Sign up for visitor tracking such as Google Analytics if you aren't already so you can get an idea of your visitor base. For help with implementing Google Analytics please read my post on adding Google Analytics to your Blogger blog.

2. Avoid Hopeless Headlines
I've seen some pretty hopeless headlines that don't give me enough of a clue about what a post is about to entice me into reading the article. If you want to attract readers to your site you need to grab them. That means putting some thought into crafting headlines that have punch. Remember your headline needs to reel your visitors in so make sure it is well thought out and punchy. Your headlines have to stand out to be noticed as so many people read headlines in RSS feeds.

Another important consideration when deciding on a headline is SEO. Consider what your readers might search under to find your post. "Blogging pitfalls" and "common blogging mistakes" are more likely keyword search phrases than "bad blogging practices." So knowing your keywords will help you craft headlines that are keyword rich.

3. Avoid Posting Too Infrequently
Once a visitor has found your site you want them to keep coming back. One way to ensure repeat traffic is to post frquently. Many new bloggers start a blog but find it hard to maintain a posting routine that is frequent enough to retain traffic.

Just the other day I had someone comment that one of the reasons why they liked my blog was the frequency at which I post. I try to post a new article every second or third day if possible. I usually am working on lots of other articles in the background so that I might have two nearly finished and half a dozen or so at various stages of completion. Using this system I have some flexibility and a cushion if anything comes up to interrupt my posting schedule.

Whatever you do don't make the mistake of posting just for the sake of posting otherwise your readers will see through this and you will lose readership.

4. Lack of Overall Focus - Trying to Paint the Whole Wall
So many new bloggers start their site without a clear focus. What kind of focus you may ask? Well making money is not enough of a focus. I am talking about identifying your niche and sticking to it. If you try and paint the whole wall your visitors will be confused about what your blog is about and you will very likely lose traffic rather than gain it.

Having a focus is important. On Blog Know How for instance, I concentrate on helping webmasters of Blogger blogs get the most out of their blog. I particularly aim my site at the new blogger and provide detailed step by step walkthroughs with them in mind. At the same time, however, I cater for all Blogger webmasters who access my blog. What I don't do though is go outside the theme of Blogger by writing about blogging in general. Instead I write articles that may be general in nature but are tailored to Blogger webmasters.

Yes I could get more traffic perhaps if I widened the scope of my articles to include Wordpress or blogging in general put what would then make my blog stand out from a whole heap of other blogs giving advice on blogging? Having a niche earns me traffic that is focused. Site visitors come with the goal of becoming more informed about using Blogger. If they go away having learnt more than when they arrived my site will have done its job and I may have just found myself a repeat visitor.

5. Avoid Too Much Advertising on Your Blog
New blogs need to build traffic and too much advertising can be a big deterrent in
achieving this goal. When your site is very new it doesn't pay to have too much advertising at all. Err on the side of less advertising rather than more. Bear in mind of course that Rome wasn't built in a day and your site won't be either. Have faith that your traffic will build and you can gradually introduce more advertising like Google Adsense as visitor numbers increase.

6. Avoid Too Many Social Bookmarking Buttons
Too many social bookmarking buttons can clutter up your blog and slow it down. Many people still don't know too much about social bookmarking so avoid the temptation to overuse these icons. Rather than use a whole bunch of popular icons like Digg and Technorati which can lead to a cluttered look and feel I use a single consolidated button like Add This. Share This is another popular button for sharing your posts.

To install a social bookmarking button on your Blogger blog follow the step by step instructions contained in my article on Add This

This article has discussed 6 common mistakes new bloggers make when developing a new Blogger Blogspot blog and given suggestions on how to avoid them.as visitor numbers increase.

Blogger Blogspot SEO Tips and Tricks


Add Your Blog to Yahoo and Submit your SitemapWant to improve SEO on a Blogspot Blogger blog? This tutorial discusses how bloggers can optimize their blog using SEO techniques to improve indexing of their Blogger Blogspot blog and achieve a better ranking in search engine results.

In this article I will be discussing the following Blogger help tips for SEO:

  • Adding Your Blogger Blog to Major Search Engines
  • Optimizing Blogger Post Titles
  • Utilising Meta Keywords and a Meta Description
  • Using Keywords in Alt Tags and Image Titles
  • Using Target Keywords in Your Post Content
  • Optimizing Blogger Title Tags
  • Optimizing Your Blogger Permalinks
  • Making Use of HTML Heading Tags Within Posts and Post Titles
  • Adding Breadcrumb Navigation to your Blogger Blog

Get Your Blog Listed by Major Search Engines
Getting listed in the major search engines is a must if you want to get traffic from search engines. I have written several in depth articles about how to add a sitemap to major search engines and how to add your blog to Google, Yahoo and MSN so I will not repeat myself. Follow these articles for step by step walkthroughs

Optimize Your Blogger Post Titles
Major search engines lend a lot of weight to titles so it is important that you craft your post titles carefully. To optimize your post titles make them keyword rich and ensure the title clearly explains what the blog post is about. Try to put your keywords at the beginning of your title for best results and avoid repeating your keywords within the title. Avoid long titles as Google only displays about 65 characters in the search results anyway.

Title tags are important if your Blogger blog is to attract traffic and rank in search engine results. On your blog home page the blog title appears between the title tags while on each individual post page it is the name of the article itself. While the title tags themselves are unseen by the visitor to your blog they are read when search engines crawl your blog.

Search engines use title tags to display your post title as a headline in search engine results. Search engines also display a description of the article either by extracting it from the post content usually by picking up the first 150 characters of your post or by reading the meta description of the post if one exists.

Meta descriptions can be crafted for individual posts in Blogger to good effect. Make descriptions unique for each post and ensure they contain your target keywords and keyword phrases to encourage search engines to extract snippets from them. To find out more about adding a meta description to an individual post please see my article Adding Meta Tags to Blogger Blogspot Blog for Better SEO


Add Meta Tags and Blog Description to Blogger
Adding meta keywords and a blog description to your Blogger Blogspot blog can boost your rankings by helping visitors locate your blog using keyword and keyword phrases. To find out the best method of inserting these into your Blogger blog please refer to my article about Adding Meta Tags to Blogger Blogspot Blog for Better SEO


Use Keywords in Alt Tags and Image Titles
Optimize the images used on your blog by making use of the alt tags and image titles. For some tips on SEO and images please refer to 10 Tips to Build Site Traffic for a Blogspot Blog


Use Target Keywords in Your Post Content
Know Your Blogger blogs keywordsMake sure you know your targeted keywords and use them within your post content. One of the factors in determining rankings is the relevance of the targeted keywords in relationship to the text that appears in the post content.


Change the Order of Post Title and Blog Title for Better SEO
One key change you can make to Blogger that will markedly improve the SEO of your blog is to adjust the title tags.

By default Blogger title tags are not optimized for search engines. The name of the blog appears before the name of the article which is not search engine friendly. Since search engines read left to right and give preference to what appears first having your blog name display before your post title is significant. To improve SEO it pays to adjust the order of title tags so that the your post title appears first:

Blog Title | Post Title

to

Post Title | Blog Title

To find out how to adjust the title tags of a Blogger Blogspot blog please refer to my article Adjust Blogger Title Tags to Improve SEO


Optimize Your Blogger Permalinks
Hand in hand with a title tag is the permanent permalink that is created when a post is published. If the title of the post is more than about 35 characters long you will strike problems with Blogger because it will shorten the title to a 35-40 character permalink. Some very ugly results happen because of this factor. For instance imagine a permalink such as:

http://blogknowhow.blogspot.com/2009/02/how-to-create-improved-permalinks-for.html

A totally useless permalink results because the blogger keyword has been left off. Learn more about crafting titles and working around the limitations of Blogger permalinks in my article How to Create Search Engine Friendly Permalinks

Optimize Blogger Blogspot Blog Permalinks

Improve SEO by Making Use of Headings for Post Titles
Heading tags are important for optimal SEO. Most Blogger.com templates use html header tags sized &lth2> or &lth3> for the post title. In the past major search engines like Google gave precedence to tags with &lth1> ahead of anything else but how important &lth1> tags are today is less certain. You could tweak the heading size of your post title if you wish however take care to ensure the look of your template isn't compromised. A bigger font will result and this may mean other parts of your blog will need to be adjusted to compensate. To find out what size your blog title is look for the following lines in your template.

&ltb:if cond='data:post.title'>
&lth3 class='post-title entry-title'>
&ltb:if cond='data:post.link'>
&lta expr:href='data:post.link'>&t/a>
&ltb:else/>
&ltb:if cond='data:post.url'>
&lta expr:href='data:post.url'></a>
&ltb:else/>
&ltdata:post.title/>
</b:if>
</b:if>
</h3>
</b:if>

As can be seen this template blog title is in &lth3&gt. To change the size of the tags just substitute the appropriate header tag where &lth3> appears


Improve SEO By Making Use of Heading Tags Within Posts
Heading tags can be used to good effect in your posts. Make sure you have only one &lth1> heading per page if you have one at all and reserve this for your post title. Make use of &lth2> and &lth3> headings throughout your post to emphasize key points and targeted keywords. Major search engines do take notice of &lth2> and &lth3> headings when crawling your blog. To add emphasis to a heading within your blog simply enclose the heading in &lth3> tags.


Add Breadcrumb Navigation to your Blogger Blog
There is a hack that can be used to add breadcrumb navigation to a Blogger Blogspot blog. Adding breadcrumb navigation can boost your SEO of your blog as well as improving how readers get around.

Add Breadcrumb Navigation to Blogspot Blogger blog for Better SEO
A breadcrumb provides text-based navigation by displaying the visitor's location within a blog. A breadcrumb provides shortcuts to enable visitors to quickly get around your blog and jump from one part of your blog to another. For example a breadcrumb for a post about meta tags would be Home > Meta Tags >Add Meta Tags to Blogger for Better SEO. An anchor text such as 'meta tags' tells search engines about the subject of the linked page. Search engines view a breadcrumb with a text link to relevant keywords in the post as important.

To find out how to add a breadcrumb navigation to your Blogger Blogspot blog please refer to my article Add Breadcrumb Navigation to a Blogger Blog


This article has focused on providing you with solid Blogger SEO advice, tips and tricks for the Blogspot Blogger. It will help you achieve good SEO results for your blog. Good luck. If you have time let me know about your experiences.


Funny Stuff

Man Behind This Blog

Krrish, currently doing his study, is a part time blogger from Delhi, India.

His areas of Interest are Computers, HTML, Web Designing WordPress and Blogger.

He Loves to work on WordPress, Blogger, PHPBB3, MYBB etc and helps others with Tips and Tricks to make successful websites..

At 99B-Everything About Blogging, he writes about Blogging, SEO, Blogger Tutorials,WordPress Tutorials, Blogger Templates and Making Money online.
He Also Provide services in WordPress Installation, Thesis Theme Customization, Link Building and more..(Portfolio Website coming Soon)
Get Traffic to Your Blogs Free- "Sign Up Today Free... "