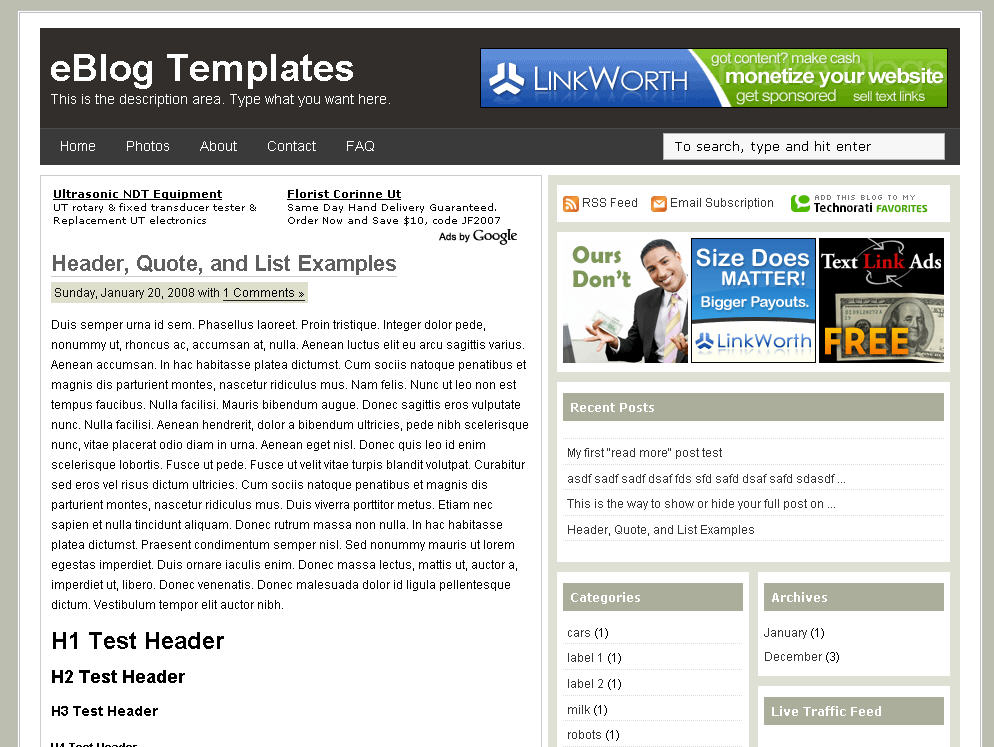
It’s either a two or 3 column template (you can change it on the fly) so you get the best of both worlds. This Blogger template is what I call a “powerhouse” template since almost all the features you need are already built in. On top of that, it’s quite easy to setup and makes your blog look like a professional site without much effort.
I predict this template will be a top template on this site within a few months, if not weeks. With the amount of effort that went into converting this template and attention to details, I sure hope you appreciate this free amazing new xml Blogger/Blogspot template.
Features Include
- Two or Three right side columns which are easy to switch (default is three)
- Three great location ad spots (header banner 468 x 60, three 125 x 125 buttons in sidebar, and a 468 x 60 AdSense banner above the first post)
- Integrated Feedburner rss and subscribe via email sidebar module (also includes “add to favorites” Technorati link)
- Built-in live traffic feed widget from FEEDJIT
- Built-in MyBlogLog and BlogCatalog recent reader widgets
- Dynamic tabs easily created by editing the link list widget
- Search box without the need for a “go” button
- Recent posts and comments widgets
- Nicely designed individual blog post comments section
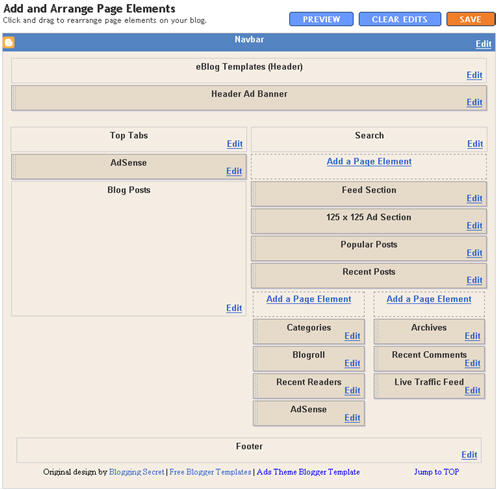
- Properly setup Blogger layout editor

Top Tabs Setup
When you first install this template the top tabs will not be visible which is normal. You’ll need to go into the Blogger page element layout editor and edit the “Top Tabs” widget. It’s a link list so just add whatever tabs you want. Don’t add a “Home” tab since it will automatically appear once you create and save the tab widget.Header Ad Banner
The default banner is hardcoded into the template but will disappear when you add anything to this widget. It’s an HTML widget so you can put the banner ad code straight into this box. This widget can also be deleted if you don’t have a 468 x 60 and you’ll just be left with the black header. Here’s the default ad code if you want to use it as a model:<a href="http://www.linkworth.com?a=10230" target="_blank">
<img src="http://www.linkworth.com/adm/affiliate_manager/affiliate_banners/bann-36.gif" border="0" />
</a>
FeedBurner RSS and Email Links
To get this section working you’ll first need to have a FeedBurner account. If you don’t already have one, please read the “How to Setup FeedBurner on Blogger” article and then come back. Another option is to just delete this widget if you’re not interested in knowing your subscriber count or allowing your readers an easy way to subscribe.Once you’ve got your FeedBurner account, you’ll need to edit this template code and replace a few parts. Search your template code for the following line
<!-- Replace Your RSS, RSS Email Subscription, and Technorati -->and then look right below that for the rss feed link.
http://feeds.feedburner.com/<strong>YOUR-FEED-NAME-HERE</strong>.
Replace the text in red with your FeedBurner name (i.e. eBlogTemplates is ours)Next we’ll need to update the subscribe via email link with your feed id. You’ll need to make sure to enable subscribe via email within FeedBurner otherwise this part won’t work.
http://www.feedburner.com/fb/a/emailverifySubmit?feedId=YOUR-FEED-ID-HERE&loc=en_US125 x 125 Ad Section
These are the three ads in the right sidebar which you need to edit the template code to change. Search the template code for <!– Replace with your 125 x 125 ads –> and then look right below that for the three lines of ad code which are:<a href="http://www.widgetbucks.com/home.page?referrer=7116002"><img src="http://i254.photobucket.com/albums/hh92/eblogtemplates/adstheme/banner-widgetbucks.gif" border="0px" /></a> <a href="http://www.linkworth.com/?a=10230"><img src="http://i254.photobucket.com/albums/hh92/eblogtemplates/adstheme/banner-linkworth2.gif" border="0px" /></a> <a href="http://www.text-link-ads.com/?ref=2164"><img src="http://i254.photobucket.com/albums/hh92/eblogtemplates/ads/text_link_ads_F_125x125.gif" border="0px" /></a>
If you’ve got ads to place in here, then just paste the code into the template. I recommend signing up for your own Text Link Ads account and using them. Each referral you convert, you get $20 (or $25 I forget). If you don’t have ads to use, you can either leave our default ads or delete this widget altogether.
Recent Posts and Comments Widgets
This one is easy to setup since we’ve already written an entire article dedicated to this. Please see “How to Setup Recent Comments and Posts Widgets” to configure these two widgets.Recent Readers Widget
You’ll need to have MyBlogLog and BlogCatalog accounts if you want to use this widget. The default widget will show the original author’s pictures so please either delete this widget or change the account ids to your own. Once you’ve setup these up, then edit the template code and search for<!-- Replace "2007112507294841" with your your mybloglog id --> and then replace the account numbers with yours.Live Traffic Feed Widget
This is a really cool feature within this template and the best part is you don’t need to do anything to setup it up! There are some further options if you click on “options >>” on your actual blog page under the widget but that’s it.You should now have the template all setup and ready to go. I hope you enjoy this beauty and please make sure to keep the footer links intact since numerous hours of my time and the original designer were put into making it. That’s all we ask for giving away this template! Enjoy!
For Further Reading,


0 comments:
Post a Comment