


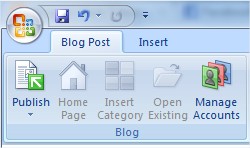
 Blogging has become one of the most popular online activities, and it has revolutionised communications media on an extensive scale. Blogs range from personal journals to the latest product updates from a major corporation. With so many tools and platforms out there for creating blog posts, it can seem challenging to find one that is the most streamlined to use. Microsoft Office Word 2007 and 2010 both contain a powerful blog post tool that takes minutes to set up. Creating posts with Word offers more options and features than typing directly into the editor in a particular blogging platform. The following are some tips to help bloggers get the most out of creating quality posts with Microsoft Word.
Preview your title
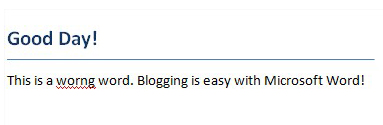
Once you select the new blog post option under the File menu options, you have a blank page with a header that prompts you to type your post title in a larger and bolder font than the rest of the post. Some bloggers write the body of their posts first and then come up with a title, and others do the opposite. Either way, use this header tool to give you a better idea of what your post title will look like on your blog next to the rest of the post.
Use editing tools
Clean up the code
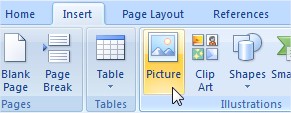
Add pictures
Take screenshots
In addition to pictures, bloggers using the latest versions of Word can add screenshots to their posts as well. Windows 7 has a handy new feature called the Snipping Tool that can create screenshots of any since that can be saved and uploaded to blogs just as with other types of images. Bloggers who write tutorials or how-to posts find this option especially useful.
Make edits to existing posts
Organise more than one blog
For Further Reading,


0 comments:
Post a Comment